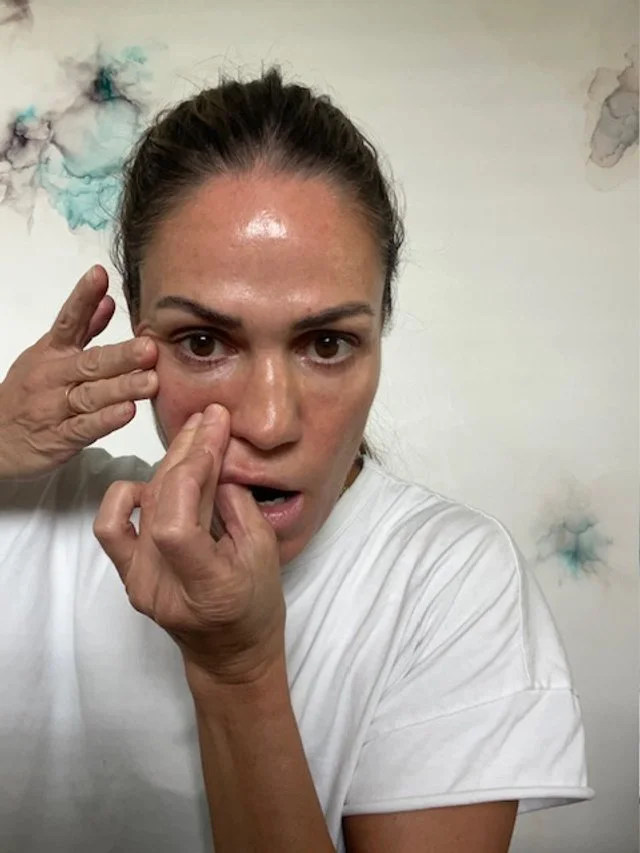
Add a video
MODULE 1
Welcome to the second lesson in our exploration of craniosacral approaches to chronic tension headaches. Having established a comprehensive understanding of headache patterns and assessment strategies in the previous lesson, you’re now prepared to master the specific hands-on techniques that form the Cranial Base Release Protocol. This protocol represents one of the most effective craniosacral approaches for addressing tension headaches, with consistent, measurable results that build practice credibility and client satisfaction. In this lesson, you’ll develop precision in executing the core techniques of this protocol, learning not just The mechanics but the subtle nuances that transform good technique into excellent outcomes. These skills will become foundational assets in your therapeutic toolkit, applicable beyond headaches to numerous client presentations.
Key Concept: The 3-Point Cranial Base Hold
This signature technique addresses restrictions at the junction between the occipital bone and the first cervical vertebra (atlas), a critical area where neural pathways, vascular structures, and dural attachments converge. Releasing restrictions here creates cascading benefits throughout the craniosacral system.
The 3-Point Cranial Base Hold serves as the foundational technique in the Neural-Somatic Freedom Method approach to tension headaches and TMJ. Its effectiveness derives from simultaneously addressing multiple contributing factors
· Suboccipital muscle tension and trigger points
· Restricted mobility at the occipital-atlas (O-A) junction
· Compressed venous drainage pathways
· Impinged neural structures at the cranial base
· Dural membrane tension patterns affecting the entire craniosacral system.
Mastery of this technique requires attention to precise hand positioning, appropriate pressure modulation, and subtle listening skills to detect and follow the tissue response.
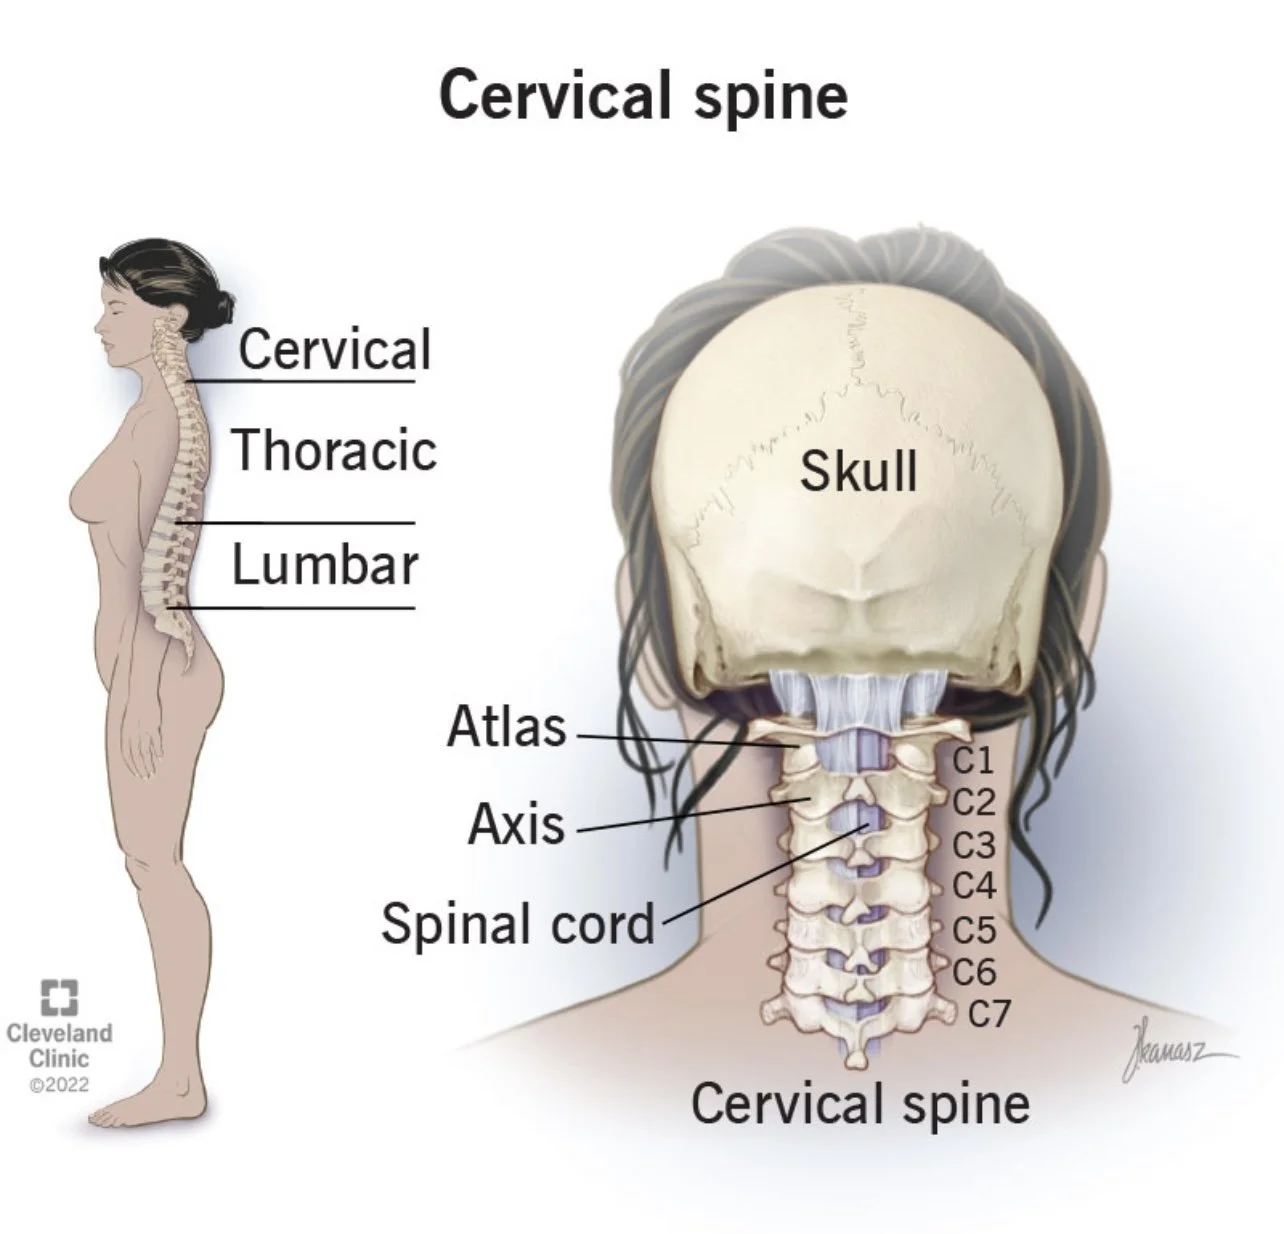
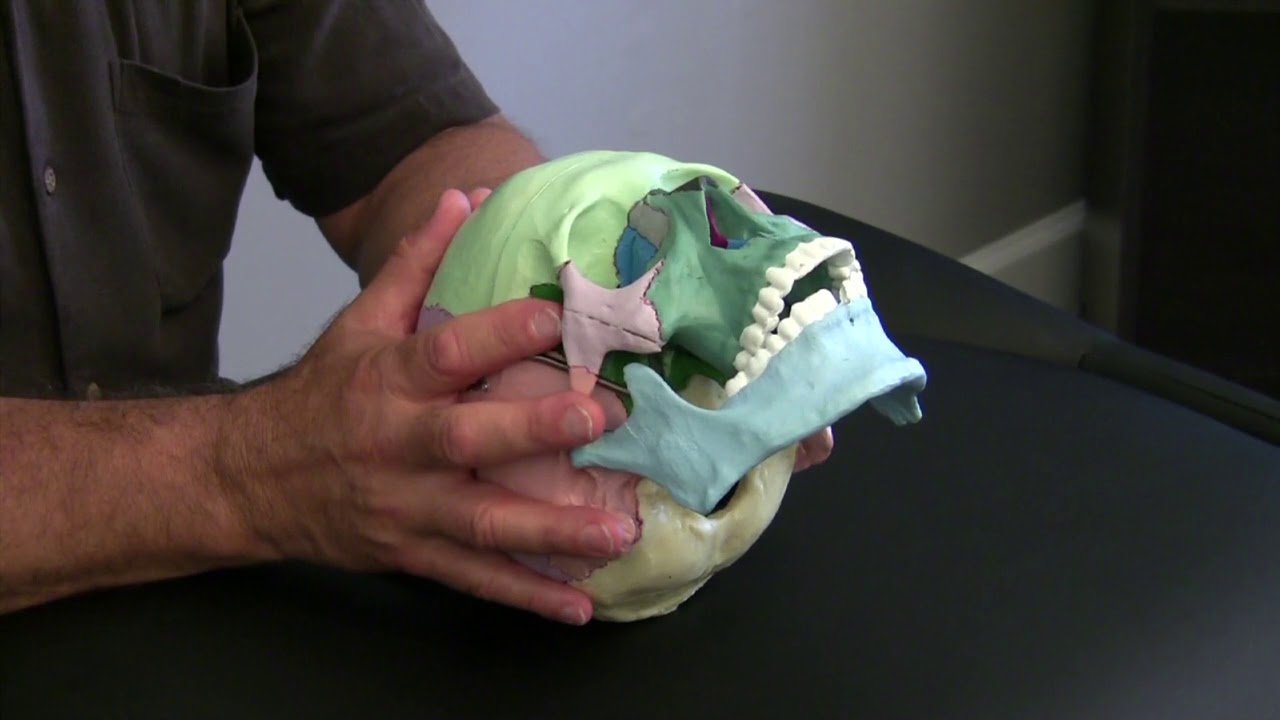
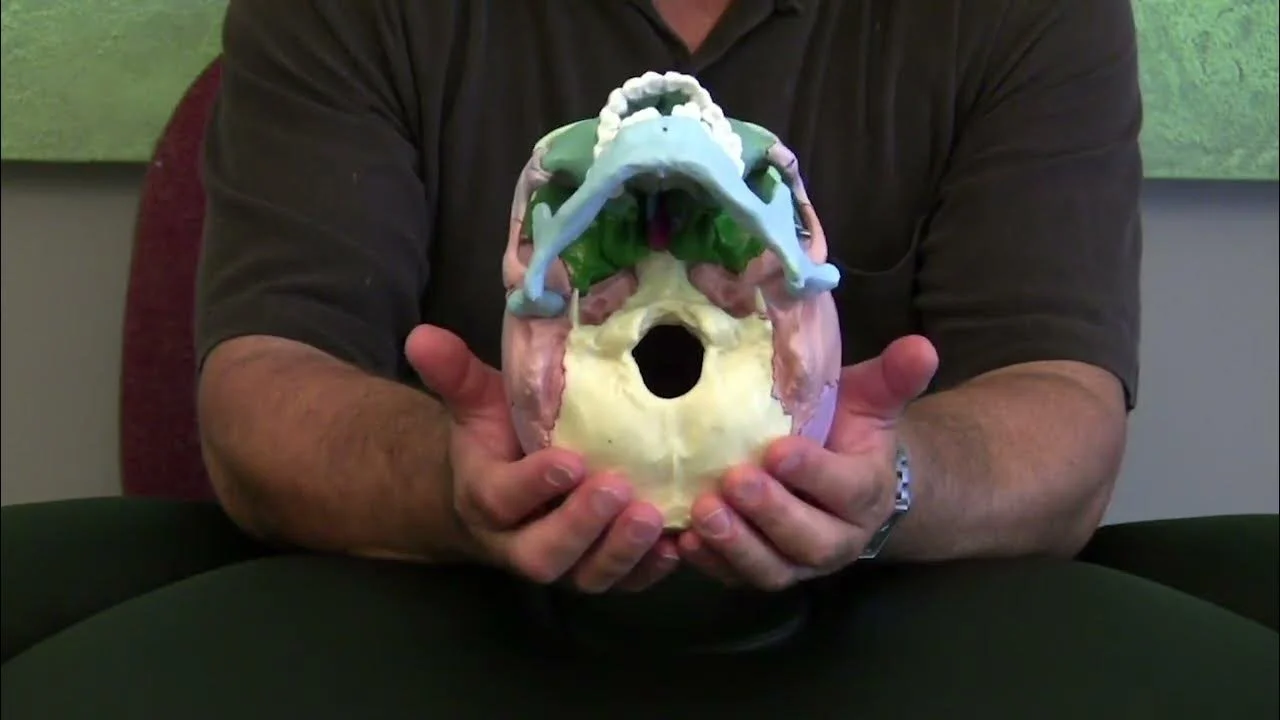
Occipital Condyles: Paired, convex articular surfaces that articulate with the atlas
Foramen Magnum: Large opening in the occipital bone where the spinal cord connects to the brainstem
Atlas (C1): Ring-shaped first cervical vertebra with concave superior facets that receive the occipital condyles
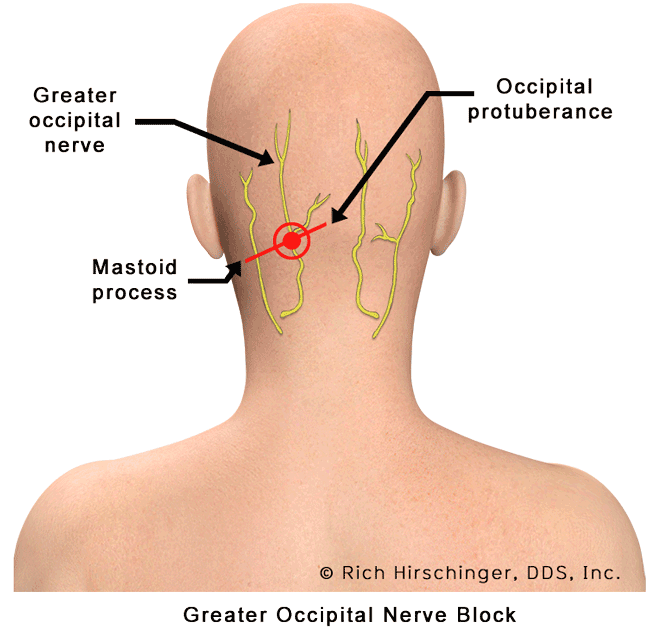
External Occipital Protuberance: Projection at the midline of the posterior occiput
Jugular Foramen: Opening where cranial nerves IX, X, XI and the jugular vein exit the skull
Suboccipital Muscles: Deep muscles connecting the skull to the upper cervical spine, including
rectus capitis posterior major/minor and obliquus capitis superior/inferior
Dura Mater: Outermost meningeal layer with significant attachment at the foramen magnum and
upper cervical spine.
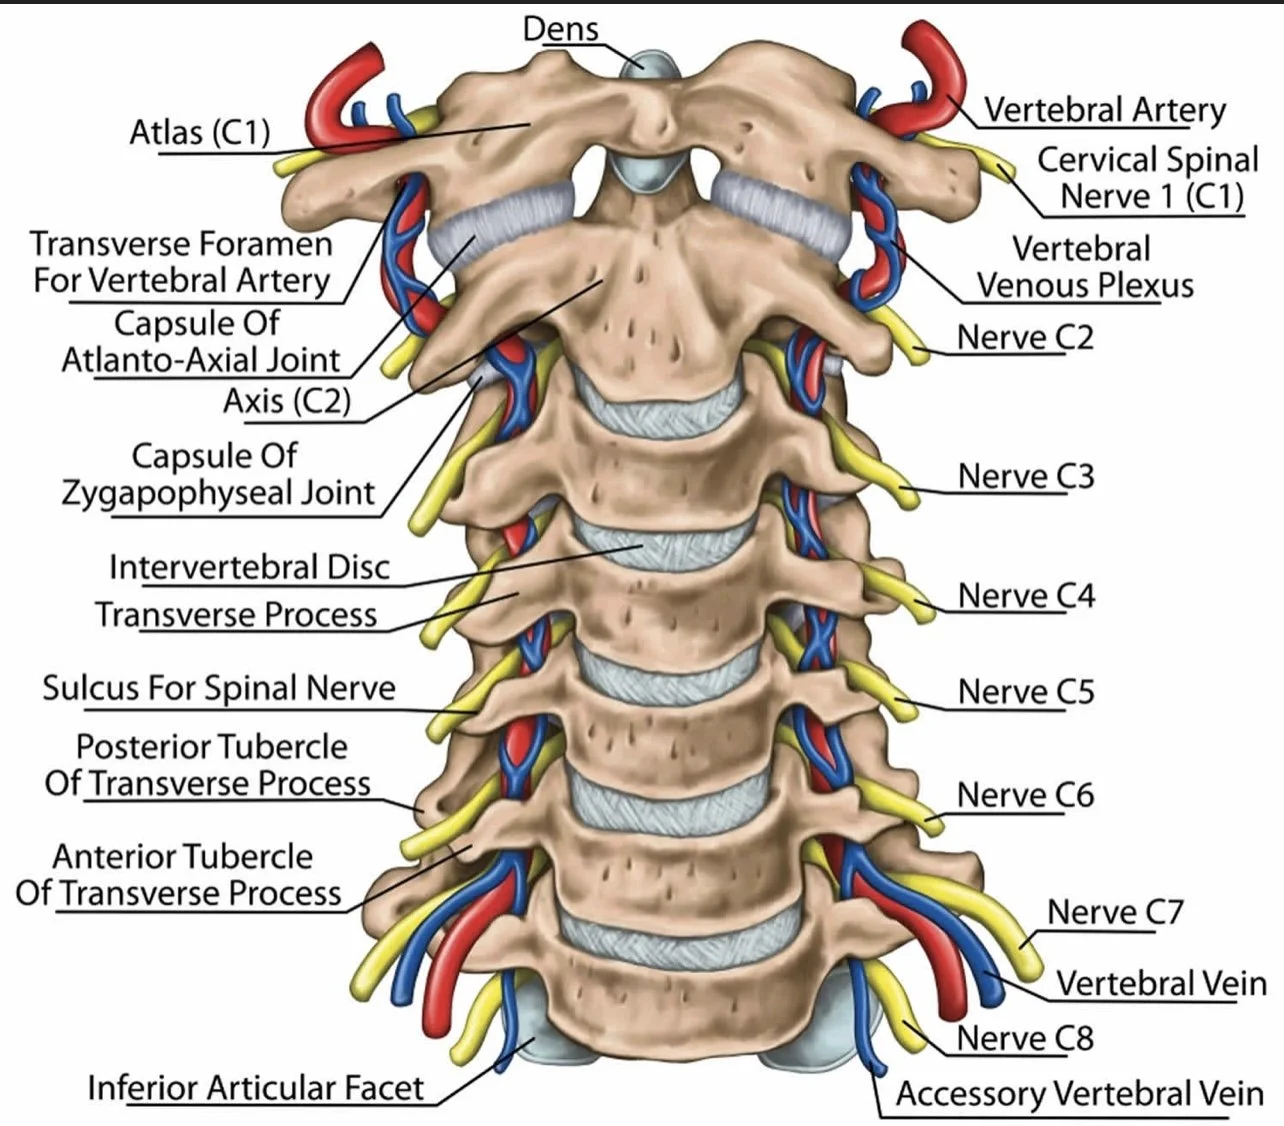
Vertebral Arteries: Pass through transverse foramina of the atlas before entering the skull
Internal Jugular Veins: Major venous drainage pathway from the brain
Upper Cervical Nerves: Particularly C1-C3, which innervate the suboccipital region and refer pain to the head
Understanding these structures allows you to visualize what you’re influencing through the 3-Point Cranial Base Hold, enhancing both your technique precision and your ability to explain the process to clients.
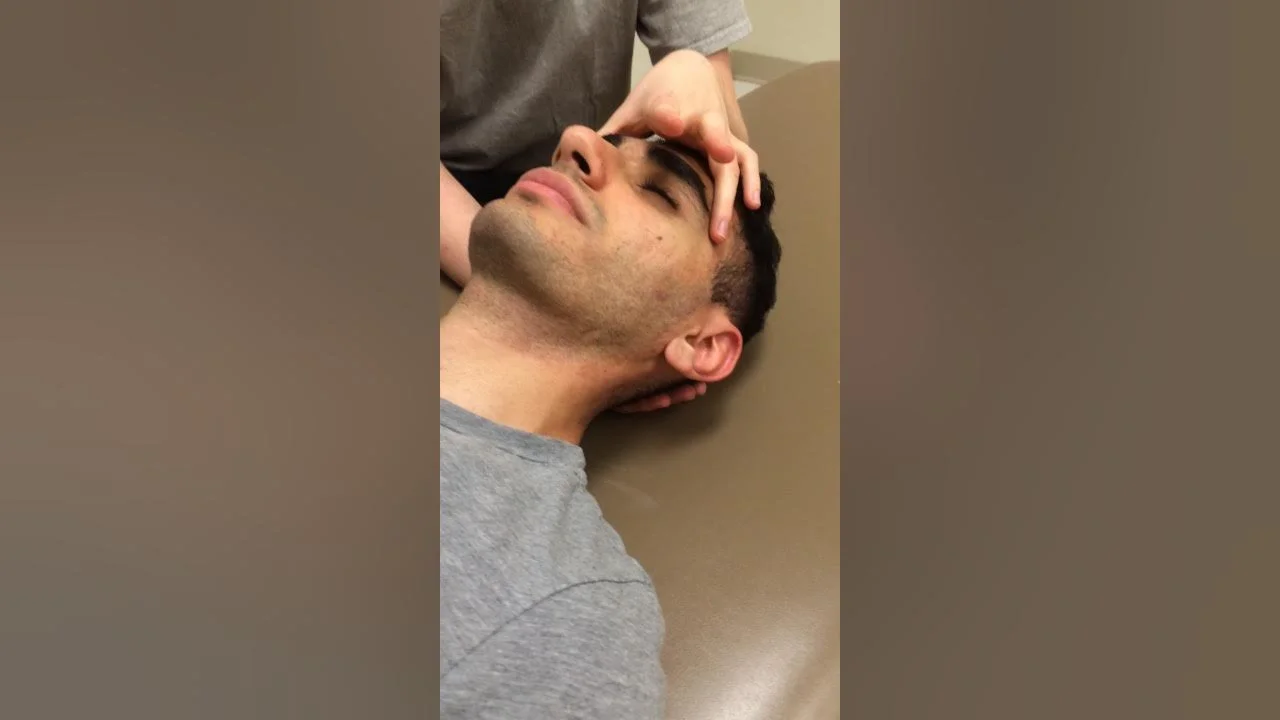
Step 1: Client Positioning
Position: Client supine on treatment table with proper support for optimal comfort and relaxation
Head Support: Thin pillow or folded towel that allows the head to rest with the neck in neutral alignment—neither flexed forward nor extended backward.
Jaw Position: Ensure the jaw is relaxed and slightly open to minimize tension patterns transferring through the temporomandibular joint.
Client Preparation: Guide the client to take several deep breaths, releasing tension with each exhalation to prepare the system for engagement.
Step 2: Practitioner Positioning
Seat Height: Seated at the head of the table with arms comfortably supported and shoulders relaxed.
Hand Alignment: Wrists neutral, fingers relaxed, with arms positioned to maintain this alignment throughout the technique.
Practitioner Centering: Take a moment to center yourself, settling your attention, and establishing a clear therapeutic intention.
Approach: Bring hands to the client’s head with deliberate, confident movements that convey therapeutic presence.
Step 3: Hand Placement for the 3-Point Hold
Contact Points: Three specific points create the therapeutic triangulation that gives this technique its name.
Point 1 (Thumbs): Position thumbs to meet at the inferior aspect of the external occipital
protuberance, resting gently in the slight depression just below this bony landmark.
Points 2 & 3 (Fingertips): Middle and ring fingers of each hand rest in the soft tissue depressions
lateral to the occipital-atlas junction, just behind the mastoid processes. Position is approximately 1-2 inches lateral to midline on each side.
Precision Note: The exact placement of lateral fingers should correspond to where you feel the greatest tissue tension or restriction during your assessment.
Hand Shaping: Remaining fingers curl naturally to cradle the client’s head, creating a secure, supportive contact without unnecessary pressure points.
Step 4: Initial Engagement
Pressure Application: Begin with very light pressure—approximately the weight of a nickel or 5 grams per contact point.
Tissue Listening: Maintain this light contact for 30-60 seconds, sensing the tissue quality, temperature, and subtle movement patterns before increasing engagement.
System Recognition: Allow time for the client’s system to recognize and respond to your touch before proceeding with deeper engagement.
Initial Response Observation: Notice any immediate responses such as sighing, swallowing, or subtle head movements that indicate system engagement.
Step 5: Deepening the Contact
Pressure Progression: Gradually increase pressure to approximately 10-20 grams (the weight of a quarter) at each contact point, allowing tissue to yield rather than forcing engagement.
Direction of Pressure: The direction of pressure varies slightly at each point:
Thumbs (Point 1): Direct pressure slightly upward toward the crown of the head
Lateral Fingertips (Points 2 & 3): Direct pressure medially (toward midline) and slightly superior
Tissue Layer Awareness: As you engage, visualize moving through layers—skin, superficial fascia, deeper fascia, muscular layers—until connecting with the periosteum and osseous rhythms.
Barrier Sensation: Stop pressure increase when you encounter the first tissue resistance barrier—the point where tissues begin to push back against your touch.
Step 6: Holding and Listening Phase
Duration: Maintain steady contact at the appropriate depth for 2-3 minutes, allowing time for the body’s response mechanisms to engage.
Active Listening: During this holding phase, practice active tissue listening, noticing:
· Subtle tissue softening or yielding
· Temperature changes under your fingertips
· Pulsation changes or vascular responses
· Asymmetrical responses between left and right sides
· Movement impulses within the tissues
Stillness Cultivation: Maintain inner stillness while holding, allowing your attention to be receptive rather than directive.
Initial Release Indicators: Watch for signs of initial tissue release such as softening, warmth, pulsing changes, or subtle unwinding movements.
Step 7: Following the Release
Tissue Response: As restrictions begin to release, follow the tissue’s natural movement tendencies rather than imposing a predetermined direction.
Common Release Patterns: Typical movement patterns include:
· Small rotational movements of the occiput
· Subtle sidebending or extension of the head
· A sense of widening or expansion at the cranial base
· Pulsation changes or fluid wave sensations
Pressure Adjustment: As tissues release, subtly adjust your pressure to maintain appropriate contact—often requiring slightly less pressure as restriction eases.
Patience: Allow the release process to unfold at its own pace; rushing this phase diminishes results.
Step 8: Integration Phase
Duration: After primary releases have occurred (typically 4-6 minutes into the technique), transition to an integration phase for 1-2 minutes.
Pressure Reduction: Gradually lighten your contact pressure while maintaining the same hand position.
Rhythm Assessment: Feel for changes in the craniosacral rhythm—typically noticing improved symmetry, amplitude, or quality of motion.
System Balancing: During this phase, your intention shifts from releasing specific restrictions to supporting whole-system integration of the changes.
Step 9: Completion and Transition
Contact Conclusion: Gradually lighten your touch until you’re barely making contact, then smoothly remove your hands.
Transition Movement: Move your hands deliberately and with therapeutic presence to the next technique position or to conclude the session.
Client Check-in: For educational purposes and to track effectiveness, briefly ask the client about any sensations they noticed during the technique.
Outcome Assessment: Note changes in tissue quality, craniosacral rhythm, and any immediate symptom changes for your documentation.
Common Challenges and Solutions
Even with proper technique execution, you may encounter certain challenges when performing the 3-Point Cranial Base Hold. Here are solutions to the most common issues:
Challenge Solution
Difficulty locating anatomical landmarks:
· Use gentle palpation to trace the contour of the occiput to locate the external occipital protuberance.
· Find the mastoid processes first, then move medially to locate the lateral contact points
· Practice on different body types during training to build adaptability
Client with very tight suboccipital muscles:
· Begin with even lighter pressure and longer engagement time
· Consider a brief gentle massage to the area before applying the technique
· Use guided breathing to help the client release tension
· Apply warmth to the area before the technique if appropriate
Client discomfort with hand positioning:
· Adjust finger position slightly to avoid tender areas
· Check that the client’s head is properly supported
· Ensure your own hand comfort to avoid transferring tension
· Use a small folded towel under your wrists if needed for support
Difficulty sensing tissue response:
· Quiet your own system through a brief centering practice
· Hold longer in the initial listening phase
· Focus on temperature and pulsation changes if movement is subtle
· Compare sensation between left and right sides to detect asymmetries
No apparent release or change:
· Check that pressure is appropriate—sometimes lighter is more effective
· Ensure your attention is present and not distracted
· Consider that the primary restriction may be elsewhere and modify your approach
· Some systems respond more slowly—extend holding time to 5-7 minutes.
Client becoming restless during technique:
· Check in verbally to reassure and reorient them to the process
· Guide them through a simple breathing focus
· Consider shortening the technique duration
· Ensure the room environment supports relaxation
Client Communication During the Technique
Appropriate communication enhances both client comfort and technique effectiveness. Here are key moments for communication during the 3-Point Cranial Base Hold:
Before Beginning
“I’m going to place my hands at the base of your skull now. This gentle contact helps release restrictions where your head meets your neck—a common source of tension headaches. You’ll feel my thumbs at the center back of your head and my fingertips on either side. The pressure will be very light. Just allow your head to rest in my hands and let me know if you feel any discomfort. Many people find this quite relaxing, and you might notice sensations of release, warmth, or gentle movement as we proceed.”
During Initial Engagement
“As I gradually engage with these tissues, I invite you to simply notice any sensations without trying to change anything. Your only job is to receive the work and breathe naturally. If you notice tension anywhere in your body, especially your jaw or shoulders, allow it to soften with each exhale.”
If Client Reports Sensations
“Thank you for sharing that. What you’re describing is a normal response as these tissues begin to release. Your system is responding well to the work. Just continue to notice these sensations without analyzing them —they’re signs of positive change occurring.”
During Completion
“I’m now gradually lightening my touch to allow your system to integrate these changes. Take a few deeper breaths as we complete this technique. Notice if there are any differences in how your head and neck feel compared to when we started.”
Key Concept: Temporal Decompression
The temporal bones house important neurovascular structures and form relationships with multiple cranial bones. Their restricted mobility contributes significantly to tension headaches, particularly those with pain in the temple region, around the ears, or radiating to the eyes.
The Decompressing these bones addresses both structural and fluid dynamic components of headache patterns. Temporal Decompression Protocol complements the 3-Point Cranial Base Hold by addressing a different but related component of many tension headache patterns. While the cranial base technique focuses on occipital-atlas relationship, this protocol targets restrictions in the temporal bones and their articulations with surrounding cranial structures.
Anatomical Considerations
Before learning the technique, it’s essential to understand the temporal bone’s complex relationships:
Key Anatomical Features
Petrous Portion: Houses the internal ear structures
Mastoid Process: Prominent posterior projection where multiple neck muscles attach
Zygomatic Process: Projects anteriorly to connect with the zygomatic bone
Mandibular Fossa: Depression that articulates with the mandibular condyle
External Auditory Meatus: Opening of the ear canal
Critical Relationships
Temporal-Occipital Suture: Posterior connection influencing cranial base freedom
Temporal-Parietal Suture (Squamosal Suture): Superior connection affecting vault tension
Temporal-Sphenoid Articulation: Medial connection impacting central cranial base mechanics
Temporomandibular Joint (TMJ): Anterior articulation with the mandible
Styloid Process: Projection serving as attachment for muscles and ligaments connecting to the
hyoid bone and pharynx
Neurovascular Structures
Middle Meningeal Artery: Passes through the foramen spinosum in the temporal bone
Cranial Nerve VII (Facial): Exits through the stylomastoid foramen
Cranial Nerve VIII (Vestibulocochlear): Passes through the internal auditory meatus
Sigmoid Sinus: Passes along the inner surface of the mastoid portion
Trigeminal Nerve Branches: Particularly the auriculotemporal nerve
Step 1: Client and Practitioner Positioning
Client Position: Supine with head neutrally aligned on a thin supportive pillow.
Practitioner Position: Seated at the head of the table with forearms supported and shoulders relaxed.
Approach Sequence: This technique typically follows the 3-Point Cranial Base Hold in the headache protocol sequence.
Step 2: Hand Placement
Basic Position: Cradle the client’s head with your palms against the lateral surfaces of the temporal bones.
Specific Finger Positioning:
Middle Fingers: Rest near the external auditory meatus (ear canal)
Ring Fingers: Contact the mastoid process area
Index Fingers: Rest along the superior edge of the temporal bone near the squamosal suture
Little Fingers: Curl naturally to support the head without specific contact points
Thumbs: Can either rest lightly on the temporal process of the zygomatic bone or remain
unengaged, depending on the specific pattern
Contact Quality: Establish even, gentle contact that encompasses the entire lateral surface of the temporal bone.
Step 3: Initial Assessment
· Listening Phase: With hands in position, spend 1-2 minutes assessing:
· Comparative density or compaction between left and right temporal bones
· Differences in temperature or tissue quality between sides
· Restricted mobility during craniosacral motion cycles
· Energetic quality differences between the temporal bones
· Motion Testing: Very gently introduce subtle compression and decompression to assess freedom of movement.
· Rotation Assessment: With extremely subtle pressure, assess freedom of external and internal rotation of each temporal bone.
Step 4: Primary Decompression Phase
Initial Engagement: Apply gentle lateral traction to both temporal bones simultaneously, drawing them slightly away from the midline.
Pressure Characteristics:
Direction: Primarily lateral with a slight inferior component
Force: Extremely gentle (approximately 5-10 grams of pressure)
Quality: Sustained, even pressure without pulsing or variation
Duration: Maintain this gentle decompression for 2-3 minutes, allowing the tissues and fluid dynamics to respond.
Response Indicators:
During this phase, you may notice:
· Subtle widening sensation between the temporal bones
· Temperature changes as circulation improves
· Pulsation changes in the temporal arteries
· Sighing or other autonomic responses from the client
Step 5: Specific Pattern Addressing
Asymmetrical Adaptation: Based on your assessment, modify the technique to address the specific restriction pattern:
For External Rotation Restriction: Apply gentle compression at the mastoid process (ring finger) while simultaneously creating a slight lateral traction at the external auditory meatus (middle finger), encouraging external rotation of the restricted temporal bone.
For Internal Rotation Restriction: Apply gentle compression near the external auditory meatus (middle finger) while simultaneously creating slight lateral traction at the mastoid process (ring finger), encouraging internal rotation of the restricted temporal bone.
For Superior Compression Pattern: Apply gentle inferior traction along the superior edge of the temporal bone (index finger) while maintaining the overall decompression.
Following Response: As you introduce these subtle directional cues, monitor for the tissue’s response and follow its lead rather than forcing a direction.
Step 6: Temporal Rocking Phase
Rocking Introduction: Once the initial decompression has created some freedom, introduce a gentle temporal rocking motion.
Movement Quality:
· Extremely subtle, approximately 1-2mm of movement
· Slow rhythm of about 6-8 cycles per minute
· Synchronize with the client’s craniosacral rhythm when possible
· Movement occurs primarily in the anterior-posterior direction
Duration: Continue this gentle rocking for 1-2 minutes to enhance fluid movement and further release restrictions.
Client Response: Many clients report deep relaxation during this phase, sometimes with sensations of “unwinding” or “release” around the ears or temples.
Step 7: Stillness and Integration
Transitioning to Stillness: Gradually decrease the rocking amplitude until you reach complete stillness while maintaining the gentle decompression contact.
Still Point Facilitation: At this phase, many clients will naturally enter a therapeutic still point—a temporary pause in the craniosacral rhythm that facilitates system reset and integration.
Duration: Allow this stillness to last for 30-90 seconds, depending on the client’s response.
Integration Signs to Watch for:
· Deep, slow breathing
· Visible facial relaxation
· Return of craniosacral rhythm with improved quality
· Symmetrical warmth across the cranium
Step 8: Completion and Reassessment
Contact Completion: Gradually ease the decompression pressure and lighten your touch to “listening” quality before smoothly removing your hands.
Reassessment: Note changes in:
· Temporal bone mobility and symmetry
· Quality of craniosacral rhythm
· Tissue density and energetic quality
· Client’s subjective report of sensation changes
Integration Period: Allow a brief (30-second) pause before transitioning to the next technique to allow the system to fully register the changes.
Client Experience and Communication
The temporal decompression protocol often creates noticeable sensations for clients. Understanding these experiences helps you provide appropriate guidance and reassurance:
Common Client Sensations During Temporal Decompression
Ear Sensations: Popping, opening, pressure changes, or sounds like water moving
Visual Effects: Changes in light perception, subtle visual field alterations
Temperature Changes: Warming or cooling sensations around the ears or temples
Pressure Relief: Feeling of pressure dissipating from the head, especially around the temples
Emotional Releases: Occasionally, emotional content may surface as tensions release
Guiding Client Communication
Before beginning the technique, prepare clients with this explanation:
“Now I’ll be working with the temporal bones, which are located on the sides of your head around your ears.
This gentle technique helps release tension that contributes to headaches, particularly those that affect the temple areas. You might notice sensations around your ears like popping or pressure changes—these are normal and indicate positive responses. Some people also notice visual changes or temperature shifts. All of these sensations are temporary and are signs that your system is responding to the work. Just observe any sensations without concern, and let me know if you experience any discomfort.”
The frontal sinuses are air-filled cavities in the frontal bone that can become congested due to inflammation, restricted fluid drainage, or cranial bone restrictions. This congestion frequently contributes to frontal headaches with pressure sensation across the forehead and behind the eyes. Facilitating proper drainage addresses both structural and fluid components of these headache patterns. The Frontal Sinus Drainage Facilitation technique completes the Cranial Base Release Protocol triad by addressing the anterior component of many tension headache patterns. This technique is particularly valuable for clients who experience:
· Frontal headache pain or pressure
· Sensation of congestion or fullness across the forehead
· Pain or pressure behind the eyes
· Headaches triggered or worsened by sinus issues or barometric pressure changes
· Visual strain-related headaches
Anatomical Foundations
Understanding the relevant anatomy enhances your effectiveness with this technique:
Frontal Region Anatomy Bony Structures
Frontal Bone: Forms the forehead and upper eye orbits
Frontal Sinuses: Paired air cavities within the frontal bone
Frontal-Parietal Suture (Coronal Suture): Junction between frontal and parietal bones
Frontal-Sphenoid Articulation: At the lesser wing of the sphenoid
Frontal-Ethmoid Articulation: At the cribriform plate of the ethmoid
Soft Tissue and Fluid Structures
Frontal Sinus Mucosa: Mucous membrane lining the sinuses
Drainage Pathways: Leading to nasal passages via the ethmoid infundibulum
Supraorbital and Supratrochlear Nerves: Branches of the trigeminal nerve (CN V)
Dural Attachments: The falx cerebri attaches to the internal surface of the frontal bone
Frontal Muscle: Overlying the frontal bone, involved in expression and tension patterns
Step 1: Client and Practitioner Positioning
Client Position: Supine with the head in neutral alignment.
Practitioner Position: Seated at the head of the table.
Sequence Placement: This technique typically follows the Temporal Decompression in the complete headache protocol but can also be used as a standalone technique for frontal headaches.
Step 2: Hand Placement
Primary Position: Place your hands on the client’s forehead with your fingers oriented toward the crown of the head.
Specific Finger Positioning:
Thumbs: Rest side by side at the center of the forehead, approximately 1 inch above the bridge of
the nose.
Index and Middle Fingers: Spread gently across the frontal bone, covering the frontal sinus areas
Ring and Little Fingers: Rest lightly on the lateral aspects of the forehead
Contact Quality: Light, even pressure across the entire frontal region with slightly firmer contact at the thumb placement.
Step 3: Initial Assessment
Listening Phase: With hands in position, spend 1 minute assessing:
· Temperature variations across the frontal region
· Areas of congestion or “fullness” sensation
· Restriction in the frontal bone’s natural mobility
· Quality of tissue under your fingertips
· Cranial Rhythm Assessment: Feel for the quality of the flexion-extension motion of the frontal bone during the craniosacral rhythm cycles.
Step 4: Frontal Lift Technique
Initial Action: Apply a gentle lifting motion with your fingertips, creating a slight superior traction on the frontal bone.
Direction: The lift direction is primarily superior (toward the crown) with a subtle posterior component.
Pressure Characteristics:
· Very gentle (approximately 5 grams of pressure)
· Even distribution across the contact points
· Sustained rather than pulsed or varied
Duration: Maintain this gentle lift for 2-3 minutes.
Response Monitoring: During this phase, notice:
· Softening of tissue quality under your fingertips
· Temperature changes (often warming)
· Subtle movement sensations as restrictions begin to release
· Changes in the client’s breathing pattern
Step 5: V-Spread Technique for Sinus Drainage
Hand Repositioning: Maintaining contact with the frontal bone, slightly reposition your fingers so that:
· Thumbs remain at the center of the forehead
· Fingertips are positioned directly over the frontal sinuses (approximately 1 inch above the eyebrows and 1 inch to either side of center)
V-Spread Application: With very light pressure (2-5 grams), create a subtle spreading motion with your fingertips, as if gently encouraging the tissues to widen away from the center line.
Direction: The spreading direction moves laterally from center, creating a “V” pattern that opens outward.
Depth Consideration: This is an extremely subtle technique that works primarily with the fluid dynamics rather than attempting to move the bony structures.
Duration: Maintain this gentle spreading influence for 2 minutes.
Step 6: Sinus Drainage Enhancement
Technique Transition: While maintaining the light V-spread contact, add a very subtle superior-to-inferior gliding motion with your fingertips.
Motion Characteristics:
· Extremely gentle strokes approximately 1 inch in length
· Direction from superior (toward hairline) to inferior (toward eyebrows)
· Speed should be slow—approximately 3-4 seconds per stroke
· Pressure remains very light, just enough to engage the fluid layers
Visualization: As you perform this movement, visualize encouraging fluid movement from the frontal sinuses down toward their drainage pathways
Duration: Continue this gentle fluid encouragement for 1-2 minutes.
Client Sensations: Clients often report sensations of “clearing,” “opening,” or “draining” during this phase.
Step 7: Coronal Suture Release
Hand Repositioning: Slide your hands slightly superior so your fingertips rest along the coronal suture (the junction between frontal and parietal bones).
Technique Application: Apply a very gentle disengagement force, as if encouraging a slight separation along the suture line.
Direction: The frontal bone is gently influenced in an anterior direction while the parietal bones receive a subtle posterior influence.
Pressure: Extremely light (2-3 grams) with even distribution across all fingertips.
Duration: Maintain this gentle suture release for 1-2 minutes.
Purpose: This component helps release tension patterns that may extend beyond the frontal region and affect the entire cranial vault.
Step 8: Integration and Completion
Final Contact: Return to the original frontal hold position with fingers spread gently across the forehead.
Pressure Reduction: Gradually lighten your touch to a barely perceptible contact.
Integration Period: Maintain this light contact for 1 minute, allowing the system to integrate the changes.
Completion: Slowly and smoothly remove your hands from contact.
Assessment: Note changes in tissue quality, temperature, and frontal bone mobility compared to your initial assessment.
When working with headaches that have a significant sinus component, these additional considerations enhance your effectiveness:
Adaptations for Sinus-Related Headaches
Assessment Additions
· Palpate for tenderness over the frontal, maxillary, and ethmoid sinuses
· Note any visible nasal congestion or postnasal drainage
· Ask about seasonal patterns or allergy relationships
· Assess if headaches worsen when bending forward
· Check for involvement of the sphenoid bone, which houses the sphenoid sinuses
Technique Modifications
· Include gentle work around the maxillary sinuses using similar drainage techniques
· Extend treatment time for the drainage phase if congestion is significant
· Consider adding gentle pressure point work at the sides of the nose
· Include sphenobasilar decompression if assessment indicates involvement
· Use slightly firmer pressure for chronic congestion patterns (still gentle but more engaged)
Contraindications and Cautions
Acute Sinus Infection: Modify or postpone treatment if client has fever, colored discharge, or acute pain
Recent Nasal Surgery: Wait at least 8 weeks post-surgery before applying these techniques
Deviated Septum: Work more gently and avoid direct pressure over affected areas
Nasal Polyps: Use extra caution and lighter pressure throughout
Pressure Sensitivity: Some clients with chronic sinus issues have heightened sensitivity—reduce pressure accordingly
Client Self-Care Recommendations
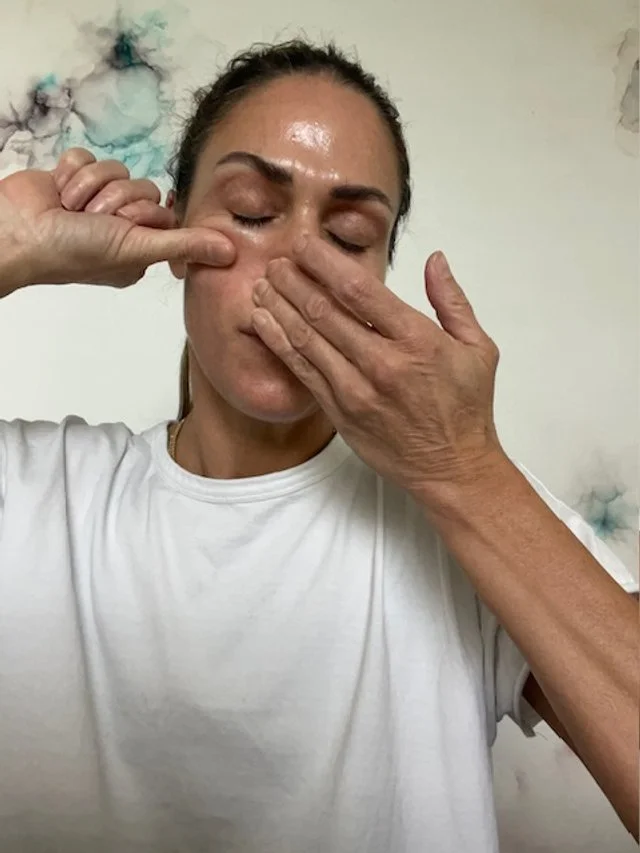
· Demonstrate gentle self-massage techniques for the frontal sinus area
· Recommend appropriate hydration to support mucous membrane health
· Discuss humidification of sleep environment if appropriate
· Suggest saline nasal irrigation as a complementary approach
· Provide guidance on identifying environmental triggers
Decision Framework: Tailoring the Cranial Base Release Protocol
With the three core techniques of the Cranial Base Release Protocol now in your therapeutic toolkit, let’s explore how to select, combine, and adapt these approaches for maximum effectiveness with different headache presentations.
Decision-Making Process for Protocol Application
Protocol Selection Flowchart
Step 1: Identify Primary Pattern and Starting Point
For primarily occipital/base of skull pain: Begin with 3-Point Cranial Base Hold
For primarily temple/side head pain: Begin with Temporal Decompression
For primarily frontal/forehead pain: Begin with Frontal Sinus Drainage
For generalized or mixed patterns: Start at the primary pain origin, then work in anterior-to-posterior sequence
Step 2: Evaluate Initial Response
Significant improvement: Continue with current technique to completion
Partial improvement: Complete current technique, then add complementary technique addressingsecondary pattern
Minimal improvement: Complete brief application, then switch to technique addressing suspected primary restriction
Step 3: Determine Sequence and Coverage
For simple, localized patterns: Apply single most indicated technique thoroughly
For complex patterns: Apply complete protocol in anatomical sequence (posterior to anterior)
1. 3-Point Cranial Base Hold
2. Temporal Decompression
3. Frontal Sinus Drainage
For mixed pain with time constraints: Apply abbreviated versions of each technique in sequence
Step 4: Integration Approach
After targeted techniques: End with gentle cranial vault hold to integrate changes
For nervous system involvement: Include CV-4 technique for autonomic regulation
For whole-system tension patterns: Include dural tube rock technique to address fascial continuity
Personalization Factors
Adapting protocol application to individual client needs significantly enhances outcomes. Consider these personalization factors:
Client-Specific Adaptations
Age Considerations:
Older clients may need gentler pressure and longer holding times
Children require shorter duration techniques with more frequent position changes
Sensitivity Level:
Highly sensitive clients benefit from even lighter touch and more gradual transitions
Less sensitive clients may require slightly firmer contact to engage effectively
Headache History:
Chronic, long-term headaches need gradual approach over multiple sessions
Recent onset headaches often respond more quickly to intervention
Condition-Specific Modifications With Migraine History:
Begin with very gentle CV-4 before direct techniques
Extend integration periods between techniques
Pay special attention to autonomic signs during work
With Trauma History:
Prioritize client comfort and control throughout
Use more verbal guidance during technique transitions
Allow more time for system to process changes
With Postural Components:
Include focused attention on cervical fascia
Address upper thoracic restrictions that impact head position
Provide more detailed self-care for postural factors
The following case examples demonstrate the decision-making process for applying the Cranial Base Release Protocol to different headache presentations.
Case 1: Michael – Computer-Related Occipital Headaches
Client Presentation:
Michael, a 42-year-old software developer, presents with headaches occurring 3-4 times weekly, always after extended computer work. Pain begins at the base of the skull and radiates upward over the occiput.
He reports tight neck muscles, and pain is relieved somewhat by stretching and heat application. Forward head posture is observable.
Assessment Findings:
Significant suboccipital muscle tension, especially on the right
Restricted craniosacral rhythm at occipital-atlas junction
Limited cervical range of motion, particularly extension
Tissue congestion and tenderness at external occipital protuberance
Craniosacral rhythm faster than normal (13 cycles/minute) with reduced amplitude
Protocol Decision Process:
1. Pattern Identification: Clear Occipital-Atlas Compression pattern
2. Technique Selection: 3-Point Cranial Base Hold as primary technique
3. Application Specifics:
Extended initial listening phase (90 seconds) due to significant tissue congestion
Focus on right side with slightly deeper engagement
Extended holding time (7 minutes) to allow for complete release
4. 5. Response Evaluation: Significant tissue softening and reported relief
Secondary Technique: Brief Temporal Decompression (3 minutes) to address compensatory
tensions
6. Integration Approach: Gentle dural tube rock to address fascial continuity from occiput to upper thoracic spine
Client Education and Self-Care:
Michael received instruction in self-administered suboccipital release using tennis balls, ergonomic workstation setup guidance, and a schedule for movement breaks during computer work. Education focused on the relationship between head position, suboccipital muscle tension, and headache development.
Outcome:
After treatment, Michael reported 80% reduction in pain intensity. Craniosacral rhythm showed normalized rate (8-9 cycles/minute) with improved amplitude. Two subsequent sessions at weekly intervals, focusing on the same protocol with progressive postural retraining, resulted in headache frequency reduction to once weekly, with lesser intensity.
Case 2: Elena – Weather-Sensitive Frontal Headaches
Client Presentation:
Elena, a 35-year-old teacher, presents with headaches that occur primarily during weather changes and seasonal transitions. Pain concentrates across the forehead and behind the eyes, with a sensation of pressure and fullness. She reports occasional nasal congestion accompanying headaches and notes that bending forward worsens symptoms.
Assessment Findings:
Tenderness over frontal sinuses with palpation
Restricted mobility of the frontal bone during craniosacral assessment
Compacted coronal suture, especially on the left side
Some compensatory tension at the cranial base
Normal craniosacral rhythm rate but diminished amplitude in frontal region
Protocol Decision Process:
1. Pattern Identification: Primary Frontal-Ethmoidal Congestion pattern with secondary Occipital-Atlas involvement
2. Technique Selection Sequence:
Begin with Frontal Sinus Drainage as primary technique based on symptom pattern
Follow with abbreviated 3-Point Cranial Base Hold to address compensatory patterns
3. Application Specifics:
Extended drainage phase in the frontal technique (4 minutes instead of 2)
Added specific attention to the frontal-ethmoid articulation
Included maxillary sinus drainage as a supplementary component
4. Response Evaluation: Immediate sensation of “opening” and pressure relief reported
5. Integration Approach: Gentle CV-4 technique to regulate autonomic function and fluid dynamics
Client Education and Self-Care:
Elena received instruction in self-massage techniques for frontal and maxillary sinuses, guidance on maintaining hydration especially during weather changes, and recommendations for environmental humidity control. Education emphasized the relationship between barometric pressure changes, sinus function, and headache mechanisms.
Outcome:
Immediately after treatment, Elena reported 70% reduction in pressure sensation. Follow-up one week later revealed the headache that typically accompanied a weather front was significantly milder and responded well to the self-care techniques. After three sessions using this protocol with progressive refinement, Elena reported being able to prevent most weather-related headaches through early intervention with self-care techniques.
Practical Coaching Exercise: Cranial Base Release Protocol Mastery
Exercise: Protocol Integration Practice
This comprehensive exercise helps you integrate the three core techniques of the Cranial Base Release Protocol into a fluid treatment sequence. Practice with colleagues before applying with clients.
Setup:
· Find a practice partner who can provide feedback on your touch quality and technique precision.
· Ensure a comfortable treatment setting with proper table height and adequate head support.
· Have a timer available for monitoring technique duration.
· Create a practice session form to document observations and feedback.
Exercise Process:
1. Assessment Phase:
Perform a brief craniosacral rhythm assessment at the cranial vault
Assess tissue quality and restrictions at the three key areas: cranial base, temporal region,
and frontal area.
Document your findings to compare with post-treatment assessment
2. Technique Application:
Apply the complete 3-Point Cranial Base Hold (8-10 minutes)
Transition smoothly to the Temporal Decompression technique (6-8 minutes)
Complete the sequence with Frontal Sinus Drainage (6-8 minutes)
Add a brief integration hold at the cranial vault (2 minutes)
3. Process Attention Points:
Focus on smooth, present transitions between techniques
Maintain consistent quality of touch throughout
Practice clear therapeutic presence during the entire sequence
Observe how each technique affects the subsequent area
4. Partner Feedback:
Have your partner rate comfort level during each technique (1-10 scale)
Request specific feedback on pressure, hand positioning, and transitions
Ask what sensations were noted during each technique
Discuss the overall flow and integration of the protocol
Assessment and Integration:
1. Re-assess craniosacral rhythm and tissue quality at all three areas
2. Compare findings with pre-treatment assessment
3. Note which techniques created the most significant changes
4. Identify areas for technique refinement
Skill Development Focus:
During this exercise, pay particular attention to developing these critical skills:
Hand Positioning Precision: Exact placement of contact points for each technique
Pressure Calibration: Maintaining appropriate pressure (5-20 grams) consistently
Listening Touch: Developing receptive quality that detects subtle tissue changes
Response Following: Adapting to the tissue’s response rather than imposing direction
Transition Fluidity: Moving between techniques with therapeutic presence
Solution Example:
A well-executed protocol integration practice might result in these observations:
Pre-Assessment Findings: Restricted craniosacral amplitude, particularly at cranial base;
asymmetrical temporal bone mobility with right side more restricted; moderate frontal bone
tension.
3-Point Cranial Base Technique Results: Gradual softening of suboccipital tissues; warmth development after 3 minutes; subtle “sinking” sensation as tissues yield; partner reports sensation of “releasing” and heaviness.
Temporal Decompression Results: Initial resistance followed by release at 4-minute mark; improved symmetry between sides; partner reports “opening” sensation around ears.
Frontal Drainage Results: Temperature change across forehead; subtle “widening” feeling under fingers; partner reports pressure reduction and clarity
Post-Assessment Findings: Improved craniosacral rhythm amplitude and symmetry; more
synchronized motion between all three regions; reduced tissue density throughout cranium
Coaching Application:
This exercise develops your ability to:
· Deliver the complete protocol with therapeutic presence and technical precision
· Recognize how the different components work together for comprehensive results
· Adapt pressure and duration based on tissue response
· Create a fluid, integrated experience for clients
· Track and document tangible changes from the protocol application
Business Application:
Mastery of this integrated protocol positions you to:
· Offer a specialized “Headache & TMJ Relief Program” as a signature service
· Create a structured treatment package with predictable outcomes
· Document results systematically for marketing materials
· Demonstrate protocol to potential referral sources with confidence
· Train other practitioners in your clinic to deliver consistent results
Effectiveness Client Education for Enhanced Outcomes
Effective client education significantly enhances the results of the Cranial Base Release Protocol. These communication tools help clients understand, participate in, and extend the benefits of their treatment.
Explaining the Cranial Base Release Protocol to Clients
Initial Protocol Explanation
“Today I’ll be using a specialized approach called the Cranial Base Release Protocol, which addresses tension headaches through gentle, precise contacts at key areas of your head and neck. This approach works by releasing restrictions in the bones, membranes, and fluid systems of your cranium that contribute to your headache pattern.
I’ll focus on three critical areas: the base of your skull where it meets your neck, the temporal regions on the sides of your head, and the frontal area across your forehead. Each area influences different aspects of your headache pattern, and by addressing all three, we create comprehensive results.
The pressure will be very light—about the weight of a nickel—as craniosacral work is more about precision than force. You might notice sensations of release, warmth, pulsing, or movement as restrictions begin to
release. These are all positive signs that your body is responding to the work. Most people find this approach deeply relaxing, and many experience significant relief even during the first session.”
Explaining Expected Outcomes
“Based on your specific headache pattern, here’s what we can typically expect from this treatment approach. Most clients experience some degree of relief during or shortly after the first session—usually a reduction in pain intensity and pressure sensation. However, the full benefits develop over a series of sessions as we progressively release the layers of tension that have accumulated.
For your particular pattern, we would typically see meaningful improvement within 3-5 sessions. This includes not only reduction in headache frequency and intensity but also improved ability to manage stress, better sleep quality, and decreased tension in your neck and shoulders.
It’s important to note that your system will continue processing the work between sessions. Some people notice continued improvement for several days following treatment. Occasionally, there might be a temporary increase in awareness of tension or mild discomfort as your body adjusts—this is actually a positive sign that change is occurring and typically resolves quickly, leading to greater improvement.”
Home Care Instructions
“To support and extend the benefits of today’s session, here are some specific recommendations for the next24-48 hours:
First, stay well hydrated by drinking plenty of water. This supports the fluid systems we’ve worked with and flush any metabolic byproducts released during the session.
Second, be mindful of your posture, especially during computer work or driving. I recommend setting a timer to remind yourself to check your head position every 20-30 minutes.
Third, practice the self-care technique I demonstrated—the gentle suboccipital release using the tennis balls —for 3-5 minutes before bed and upon waking.
Finally, notice any changes in your headache pattern, sleep quality, or tension levels and make brief notes to share at our next session. This feedback helps me refine your treatment plan for optimal results. If you do experience a headache before our next session, try the self-care technique at the earliest sign, as early intervention is often most effective.”
Explaining the Science in Simple Terms
“Let me explain briefly how this approach helps resolve headaches. Your skull isn’t actually a solid structure— it’s made up of separate bones that have subtle mobility, almost like they’re breathing very gently. This movement helps pump the cerebrospinal fluid that nourishes your brain and spinal cord. When tension builds from stress, posture, or injury, these bones can become restricted in their natural motion. This affects not only the fluid flow but also puts pressure on nerves and blood vessels that run through the area. The result is often experienced as headache pain. The techniques I’m using help restore optimal motion to these bones and the membranes connecting them. As movement improves, fluid circulation enhances, nerve impingement decreases, and blood flow normalizes. Your body has a remarkable ability to return to balance when restrictions are released, and that’s exactly what we’re facilitating.